
Making A Memory Game with an Authenticated Leaderboard with Passage

Passage Match - A Memory Game with a Leaderboard
Project Description
Passage Match is a simple memory game in which you have to identify all the matching pairs in a set of cards facing backward. Once you win a round, the game will calculate your score based on a few factors and upload it to a database, and if you score high enough, your score will be displayed on the built-in leaderboard.
Quick Demo
Tech Stack
The following technologies were used to develop this project:
Next.js for front-end development
PlanetScale as the database for storing user data and scores
Prisma for the ORM.
TailwindCSS for styling
Development
As the game itself is very simple, I won't go into its implementation details too much. What will be worth focusing on here is the implementation of the authentication (which was made very easy using Passage) and the leaderboard system, secured by the aforementioned authentication system.
The Game
When developing the core game, I started with a very simple card-matching memory game. I then added some code to track scores when users have completed matching the cards. The scores are calculated by a few different factors, namely how fast you finish the round and how many turns you take to match each pair.
Authentication with Passage
When making this game, I always had in mind to add a scoreboard or leaderboard system to track the best scores, but I didn't want anyone to just be able to add scores. So the solution was to add an authentication system, both to track users and reject unauthenticated attempts to store scores on the leaderboard. But for a simple game like this, no one would want to go through the traditional process of creating an account and logging in with their credentials.
So, I thought that Passage would be perfect for this. It removes the complication of traditional login flows and replaces it with passwordless authentication. And, as it turns out, it made it easier for me as the developer as well.
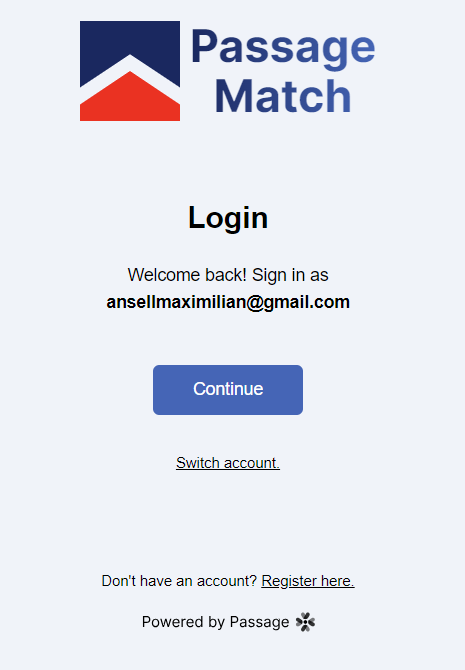
Adding Passage to the Front End
To add Passage to your front end, you first need to install the @passageidentity/passage-elements package.
npm install @passageidentity/passage-elements
The next step is to decide where to put your authentication page. Traditionally, this would be divided into two separate elements/pages (the register and login UIs). With passage, however, this has been abstracted into a single element. So, in my case, I only had to decide on which page I wanted to put this element. Since I'm using Next.js 13, I'm putting it on the app/auth/page.tsx file.
Due to Next.js's pre-rendering system, importing the previously installed package is a little more complicated (explanation here), but it's still overall very simple.
On the page file, add "use client" to the top of the page file and the following useEffect.
"use client"

// Inside the page component
useEffect(() => {
    require("@passageidentity/passage-elements/passage-auth");
    setIsMounted(true);
  }, []);
Then, simply add the element in your JSX:
return <passage-auth
    app-id={process.env.NEXT_PUBLIC_PASSAGE_ID as string}
></passage-auth>
That's it. Now you have a functioning authentication system. As you see, the element does take the app-id property, so make sure you add that to your environment variables. Since I am using Next.js, I had to append the variable NEXT_PUBLIC to make sure it is available on the client.
With just that one element, users are now able to register, sign in, switch accounts, etc. in your app.
Setting Up a Database for User Data and Scores
Passage does a great job with authentication. Now I can focus on other things. I want scores to be stored and later fetched, so I need some database. I also need scores to be associated with users.
For this project, I've chosen to use PlanetScale as my database and Prisma as the ORM. Scores will be stored in a table called Score with a few columns, namely: id, score, and userId. score will store the user's, well, score. userId will be used to associate the Score table with the users which will be stored in the User table.
The User table will be a little more complicated, as I need to correlate the users in my PlanetScale database to the users in the Passage Console. So, the User table will have the following columns: id, passage_id , and name.
Firstly, you will need to set up a PlanetScale database and get its connection string. Once you have the connection string, store it as an environment variable called DATABASE_URL. Prisma will automatically detect and connect with it.
Now, install the needed dependency:
npm install @prisma/client
After this, initiate Prisma by typing the following command:
npx prisma init
This will generate a schema.prisma file in which you will be describing your tables. Here is what my schema file looks like:
generator client {
  provider = "prisma-client-js"
}

datasource db {
  provider = "mysql"
  url      = env("DATABASE_URL")
  relationMode = "prisma"
}

model User {
  id              String   @id @default(uuid())
  passage_id      String   @unique
  name            String
  createdAt       DateTime @default(now())
  updatedAt       DateTime @updatedAt
  scores          Score[]
}

model Score {
  id              Int  @id @default(autoincrement())
  user            User @relation(fields: [userId], references: [id])
  userId          String
  score           Int
  createdAt       DateTime @default(now())
  @@index([userId])
}
A few things are worth noting here, mainly the scores entry on the User model and the user entry on the Score model. They are both used to set up the relationship between the two models in a one-to-many relationship (users can have many scores). This will make querying easier later.
Now you just have to run the following command to push your schema to the PlanetScale database:
npx prisma db push
Your database is now ready.
Creating Users After Passage Authentication
Now that the database is all setup, I need some way of creating a corresponding database user after a user logs in/registers using Passage in the most convenient way possible (we don't want to defeat the whole purpose of easy authentication).
Luckily, Passage provides an easy way to do just that, by allowing us to override default callbacks. By default, Passage has an onSuccess hook that gets executed every time a user signs in or registers. We can take advantage of that by overriding the logic.
To do this, we need to add a little bit of code. On the app/auth/page.tsx file, add the following code:
 const ref = useRef<any>();


const onSuccess = () => {};

useEffect(() => {
    if (ref.current) {
        const { current } = ref;
        current.onSuccess = onSuccess;
    }
});
We will add the logic later. As you can see, we make use of useRef to select the passage-auth element and modify its onSuccess property. Now modify the JSX by adding the ref property:
return <passage-auth
    ref={ref}
    app-id={process.env.NEXT_PUBLIC_PASSAGE_ID as string}
></passage-auth>
Now we need to write the logic to create users in the database on the onSuccess hook. We want this to be secure, so we will take advantage of Next.js' route handlers. Create a app/api/users/route.ts file and add the following code:
import { NextRequest, NextResponse } from "next/server";
import { PrismaClient } from "@prisma/client";

interface RequestBody {
  name?: string;
  email?: string;
  passage_id?: string;
}

const prisma = new PrismaClient();

export async function POST(request: NextRequest) {
  const { name, email, passage_id } = (await request.json()) as RequestBody;
  if (!name || !email || !passage_id) {
    return NextResponse.json({ message: "Missing fields." }, { status: 500 });
  } else {
    try {
      const newUser = await prisma.user.create({
        data: {
          name,
          email,
          passage_id,
        },
      });
      return NextResponse.json(newUser);
    } catch (error) {
      return NextResponse.json(
        { message: "Error creating user." },
        { status: 500 }
      );
    }
  }
}
This will define a route handler that can be called to create users in the database. As you can see, it takes the passage_id from the request body and assigns it to the user in the database. This is how we correlate Passage users to our own.
On the onSuccess callback we defined earlier, write the following code:
const onSuccess = async (authResult) => {
    // check if user exists
    const passageUser = new PassageUser();
    const userInfo = (await passageUser.userInfo()) as PassageUserInfo;

    const existingUserRes = await fetch(`/api/users/${userInfo.id}`);

    if (existingUserRes.status === 404) {
      const newUserRes = await fetch("/api/users", {
        method: "POST",
        body: JSON.stringify({
          name: "Anonymous",
          email: userInfo.email,
          passage_id: userInfo.id,
        }),
        headers: {
          "Content-Type": "application/json",
        },
      });
    }

    router.push(authResult.redirect_url);
  };
Here, every time a user logs in or registers, we check if that particular user has already been created in the database; if not, we proceed to call that route handler we defined and create a new one. As you can see, we start by giving the users Anonymous as their name. They will be able to modify this easily later.
Adding User to the App State
Now I will focus on assigning the currently logged-in user to the app state, so they can be easily retrieved whenever I need their data. I will be using a custom hook and a React Context to accomplish this.
First, create a file to store both the custom hook and the Context. Write the following:
import {
  PassageUser,
  PassageUserInfo,
} from "@passageidentity/passage-elements/passage-user";
import { useEffect, useState } from "react";

import { createContext, useContext } from "react";

interface UserWithData extends PassageUserInfo {
  name: string;
  passage_id: string;
}

interface UserContext {
  user: UserWithData | null;
  logout: () => void;
  updateName: (newName: string) => void;
}

export const UserContext = createContext<UserContext>({
  user: null,
  logout: () => {},
  updateName: () => {},
});

const useUser = () => {
  const [user, setUser] = useState<UserWithData | null>(null);

  useEffect(() => {
    (async () => {
      try {
        const passageUser = new PassageUser();

        const userInfo = await passageUser.userInfo();
        if (userInfo) {
          const userDataRes = await fetch(`/api/users/${userInfo.id}`);
          const userData = await userDataRes.json();
          setUser({ ...userInfo, ...userData });
        } else {
          setUser(null);
        }
      } catch (error) {}
    })();
  }, []);

  const logout = async () => {
    const passageUser = new PassageUser();

    const res = await passageUser.signOut();
    if (res) setUser(null);

    return res;
  };

  const updateName = (newName: string) => {
    setUser((prev) => (prev === null ? null : { ...prev, name: newName }));
  };

  return { user, logout, updateName };
};

export default useUser;
A lot is going on, but what the hook basically does is fetch the user from the database (using another route handler I created) and assign it to the user state, merging it with all the properties available from the passage user object. It also exposes some convenience functions, such as logout and updateName, which we'll use later.
Next, I add the Context Provider in the main component:
const MainPage = () => {
    const {user, logout, updateName} = useUser();
    return <UserContext.Provider value={{user, logout, updateName}}>
// JSX here
</UserContext.Provider>
}
Now I can easily get the user with this:
const { user, logout } = useContext(UserContext);
Adding a Leaderboard
Now it's time to implement the leaderboard system. Looking at it at a high level, I need to do the following things:
Create a route handler to upload/store a user's score once the win
Make sure only authenticated users can get their points stored
Fetch the scores and display them
Creating the Route Handler to Store Scores
After creating an app/api/scores/route.ts, add the following code:
import { NextRequest, NextResponse } from "next/server";
import { PrismaClient } from "@prisma/client";

interface RequestBody {
  userId?: string;
  score?: number;
}

const prisma = new PrismaClient();

export async function POST(request: NextRequest) {
  const { userId, score } = (await request.json()) as RequestBody;
  if (!userId || score === undefined) {
    return NextResponse.json({ message: "Missing fields." }, { status: 400 });
  } else {
    try {
      const newScore = await prisma.score.create({
        data: {
          userId,
          score,
        },
      });

      return NextResponse.json(newScore);
    } catch (error) {
      return NextResponse.json(
        { message: "Error creating score." },
        { status: 500 }
      );
    }
  }
}
Now whenever we call this route handler, a score will be stored based on the provided parameters in the body of the request. We just need to call this in the logic which determines when a user wins the game.
But there is a problem: anyone can call this function and create scores. I want only authenticated users to be able to have scores. Another package by Passage helps me with exactly that: @passageidentity/passage-node.
First, install the package.
npm install @passageidentity/passage-node
Then modify the previous code into this:
import { NextRequest, NextResponse } from "next/server";
import { PrismaClient } from "@prisma/client";
import Passage from "@passageidentity/passage-node";

const passage = new Passage({
  appID: process.env.NEXT_PUBLIC_PASSAGE_ID as string,
  apiKey: process.env.PASSAGE_API_KEY as string,
});

interface RequestBody {
  userId?: string;
  score?: number;
}

const prisma = new PrismaClient();

export async function POST(request: NextRequest) {
  try {
    // Authenticate Users
    let userID = await passage.authenticateRequest({
      ...request,
      headers: { ...request.headers, cookie: request.cookies.toString() },
    });
    if (userID) {
      const { userId, score } = (await request.json()) as RequestBody;
      if (!userId || score === undefined) {
        return NextResponse.json(
          { message: "Missing fields." },
          { status: 400 }
        );
      } else {
        try {
          const newScore = await prisma.score.create({
            data: {
              userId,
              score,
            },
          });

          return NextResponse.json(newScore);
        } catch (error) {
          console.log(error);

          return NextResponse.json(
            { message: "Error creating score." },
            { status: 500 }
          );
        }
      }
    } else {
      return NextResponse.json({ message: "Unauthorized" }, { status: 403 });
    }
  } catch (error) {
    return NextResponse.json(
      { message: "Could not authenticate" },
      { status: 500 }
    );
  }
}
Now, using Passage, I am able to determine if a user is authenticated or not. Passage does this automatically by looking at some cookies stored in the browser.
Note on Authenticating with Passage on a Next.js Route Handler
I did run into some trouble authenticating a server request with Passage. Usually, all you have to do is call the passage.authenticateRequest method and supply it with the request object and it will work.
However, when I first tried that, it gave me an error, saying something like, "Passage could not find a cookie to authenticate with". After looking at the package repository, I found out that the method looks for cookies in the form of a string in therequest.headers.cookie property, while Next.js stores it in request.cookies. And it's in an entirely different format.
Luckily, I was able to resolve the issue by supplying the method with the following hack:
{
    ...request,
    headers: { ...request.headers, cookie: request.cookies.toString() },
}
Fetching the Scores and Displaying them
For this, I create another route handler for fetching the code. This route will be available to everyone, so anyone can see the leaderboard. Then in the appropriate logic, I call the route handler and display the scores. Here is the result:


